
React Native - Create Your Own Accordion Object
Hello every one, today in this article we are going to talk about how can we create our own external object and we will import it inside our project. Now lets get started...First I have to talk about what is accordion and what it does ?
Sometimes there will be so many components on our screen and it will be hard to find what we are looking for. In this time groupping and hiding what we are not looking for the components is the best. We can do this with accordion component. In this project example we are going to build an accordion that will have the ability opening and closing like an accordion. So we can hide and unhide the unnecessary components from the screen. Now lets get started to code our accordion external framework.
I have created a framework folder and file like in the below image :
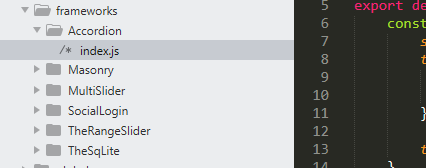
Under the project folder I have created the frameworks folder to keep other frameworks and under it Accordion folder. In here I have created just an index file. We are going to write our java script codes in this file.
Now we are ready. First we need to import libraries we will use. Basically I have imported below libraries.
import React, { Component } from 'react';
import {StyleSheet,Text,View,TouchableHighlight,Animated,Image} from 'react-native';
Now we need to EXPORT our class.
export default  class Accordion extends Component{
     //lets write some code here to configure.
     //show time :)

     render(){
          return(
               //our components to show.
          );
     }
}
After this we need to create our constractor and wrtie codes that we will need. Below section I have a constractor and a function to make toggle process. Let me explain this in the code. We need to write these code block inside default class and before render() function.
constructor(props){
        super(props);
        //Here we hold the expanded data. When this value get changed
        //it will re render the current component and changed expanded value
        this.state = { expanded : false };
    }

    //In this function we will change the expanded value in state
    //So it will re-render the component with changed expanded value
    toggle(){
        this.setState({
            expanded : !this.state.expanded
        });
    }
Our functions are ready tu use. Now we need to call this function from a button or something like that. Let me design a screen to do this.
render(){
        //Here we have specified the icons we use
        //for hide/unhide toggle button
        let togge_icon= './images/buttons/down_arrow.png';
        if(this.state.expanded){
            togge_icon= './images/buttons/up_arrow.png';
        }
        //return our component's screen
        return (
            <View
                style={styles.container}>
                <View style={styles.titleContainer}>
                    <Text >{this.props.title}</Text>
                    <TouchableHighlight
                        style={styles.button}
                        onPress={this.toggle.bind(this)}
                        underlayColor="#f1f1f1">
                        <Image
                            style={{height:20,color:"gray",marginRight:10 }}
                            source={require(togge_icon)}
                        />
                    </TouchableHighlight>
                </View>
            {
                   this.state.expanded &&
                         (
                            <View style={{padding: 10, paddingTop  : 0,  }}>
                                 {this.props.children}
                            </View>
                          )
               }
            </View>
        );
    }
As you can see above there are properties name like this.props... . With these keywords we will pass our datas. We are going to set the title and the components will be grouped by the accordion. Here the examples : this.props.title and this.props.children. After the title section now we need to place our children objects. These objects will send by the main class. You can edit your own StyleSheet classes. I will not pu that here. Now we are ready to use this component in MainClass. I will use this component in App.js file. I will place it under a View component. In here I will share the code and explain it later part by part.
Now let me start to explain App.js file :
First we need to import our Accordion framework. Below code section will import our external library:
//Here import the external library
import Accordion from './../frameworks/Accordion/index';
After including now we are ready to use this library. Below code section has an example of accordion.
<Accordion title="Social Media Accounts" >
          <View style={{flexDirection:'row', width: window.width,height:40, margin: 5,
            padding:2, alignItems:'center', justifyContent:'center', backgroundColor:'#fff'}}>
            <View style={styles.btnContainer}>
              <TouchableHighlight
                style={styles.btnUserActionsSquare}
                onPress={() => {

                }}  >
                <View
                  style={styles.btnContainer}>
                  <Image
                    style={styles.btnSocialIcon}
                    source={require('./../images/social/facebook.png')}
                  />
                </View>
              </TouchableHighlight>
            </View>
//include here more social account areas...
</Accordion>
Basically it will be showed like below :
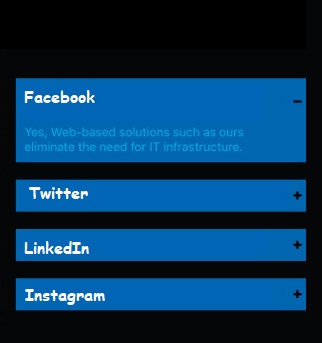
That's all in this article.
Have a nice coding.
Burak Hamdi TUFAN
Tags
Share this Post
Author

I am a software developer experienced 15 years and here to share all my programming experiences. I have worked on so many platforms and programming languages especially C, C#, C++ and Java. I am studing PhD at Kocaeli University on Aviation Technologies. I am building softwares and technologies on aviation.
DevExtreme ile Web Servis Kullanımı


Comments