
PWM Generation in Arduino
Hello everyone, in this article we are going to see how to read a potansiometer and get analog value, after it we will set a pwm signal according to this value. It is quite simple.Let's begin.
PWM signal is one of the oldest communication methods between the electronic devices. PWM stands for Pulse Width Modulation. It is transferring the data according to the pulse widths. It is using at most embedded applications. Generally brushless motor drivers, DC motor drivers has inputs for PWM to set the motor speeds.
In this example we are going to use an arduino to generate a PWM signal. Also we are going to use a potensiometer to set the value.
Below you will see how to do it:
First we declare the pins which we are going to make connections We will use the pwm_pin to sent the pwm signal out. Then we are going to declare our value variables. In these example we are going to declare two variables One of the is to hold analog value from potansiometer the other one is to hold pwm value.
//First we declare the pins which we are going to make connections
//We will use the pwm_pin to sent the pwm signal out.
#define pwm_pin  1
#define analog_pin  A0
//Then we are going to declare our value variables. In these example we are going to declare two variables
//One of the is to hold analog value from potansiometer the other one is to hold pwm value.
int analog_value;
int pwm_value;
Then we will set the setup configuration.
At setup section We have to set the pwm_pin as OUTPUT. We will send the pwm signal via specified pin. And to print pwm value via serial port we should enable the serial port.
void setup() {
  // At setup section We have to set the pwm_pin as OUTPUT.
  //We will send the pwm signal via specified pin.
   pinMode(pwm_pin, OUTPUT);

   //And to print pwm value via serial port
   //we should enable the serial port
   Serial.begin(9600);
}
Our program configuration is ready. Now we are going to write our program loop.
First we have to read the analog value through potansiometer. We will use this value to set the pwm value. We will use the map function to scale the analog value and set the pwm value variable. Analogwrite function makes the analog pwm output between 0 and 255. So here we will scale the analog value between 0 and 1023 to 0 to 255.
With analogWrite function we will set the prepared pwm output signals via the specified pwm_pin. Also we will write the value to the serial port to check what is going on.
void loop() {
  // put your main code here, to run repeatedly:

  //First we have to read the analog value through potansiometer.
  //We will use this value to set the pwm value.
  analog_value = analogRead(analog_pin);

  //We will use the map function to scale the analog value
  //and set the pwm value variable.
  //Analogwrite function makes the analog pwm output between 0 and 255
  //So here we will scale the analog value between 0 and 1023 to
  //0 to 255.
  pwm_value = map(analog_value, 0, 1023, 0, 255);
  //With analogWrite function we will set the prepared pwm output
  //signals via the specified pwm_pin.
  analogWrite(pwm_pin, pwm_value);
  //Also we will write the value to the serial port to check
  //what is going on.
  Serial.println(pwm_value);
  delay(1);
}
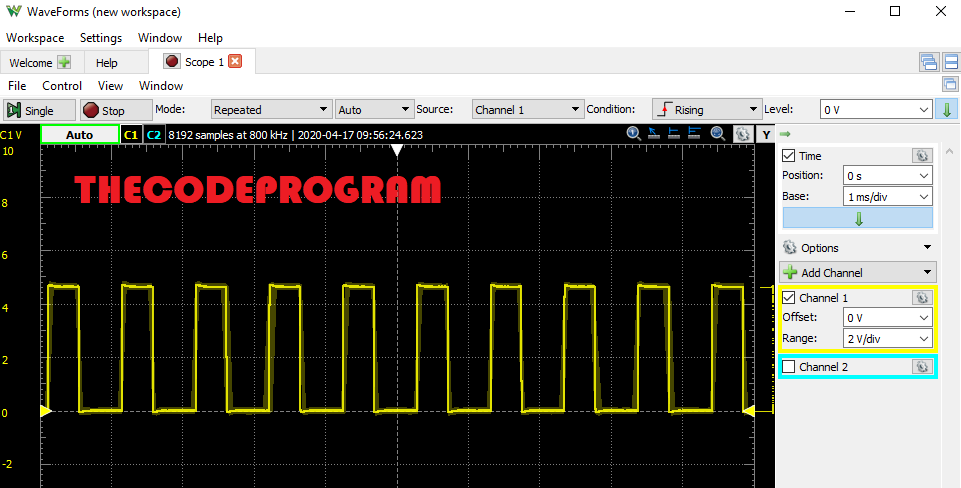
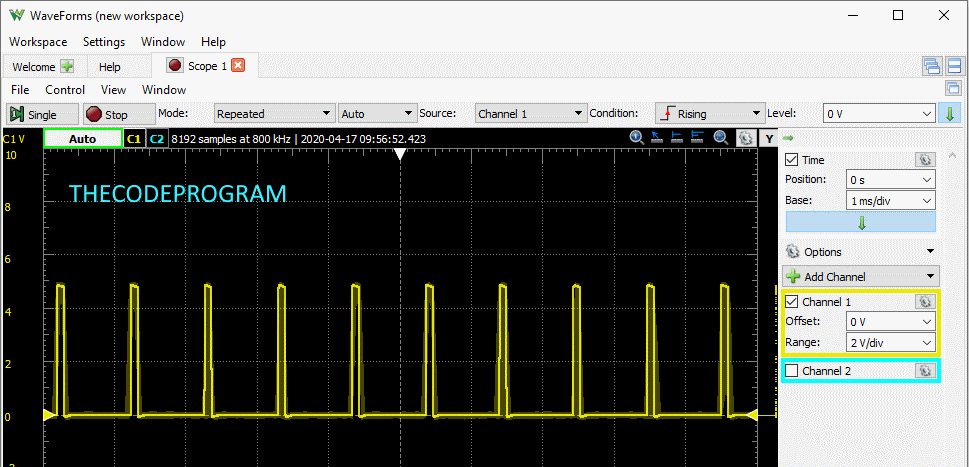
Below you can see the Scope images.
Here is serial port image to see the pwm values on serial port:

That is all in this article
You can reach the example program file on Github via : https://github.com/thecodeprogram/TheSingleFiles/blob/master/pwm_with_pot.ino
Have a good PWM generating
Burak Hamdi TUFAN
Tags
Share this Post
Author

I am a software developer experienced 15 years and here to share all my programming experiences. I have worked on so many platforms and programming languages especially C, C#, C++ and Java. I am studing PhD at Kocaeli University on Aviation Technologies. I am building softwares and technologies on aviation.


Comments