
How to build and apply own custom Theme in Android
Hello everyone in this article we are going to talk about how can we create a custom theme for our android application in android studio. After building of the theme we will apply it with a button.Let's begin.
To do this first we have to create a new project in android studio with an empty activity. In this activity we will place two buttons two change the current theme, a TextView. Below you can see the activity design file.
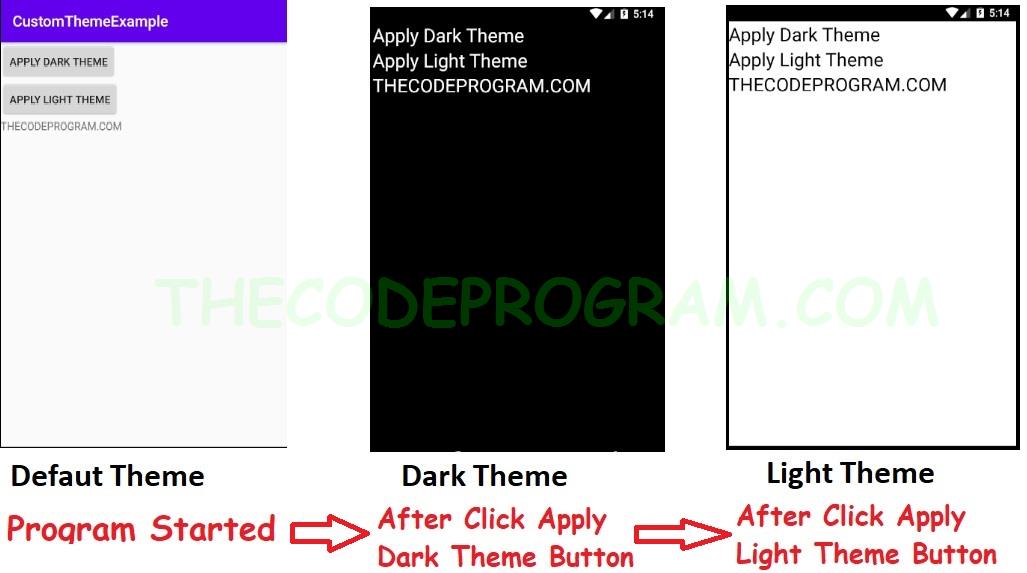
In this example we are going to make a simple a night mode and day mode application. When we pressed the related buttons the theme of the application will be changed and applied to the related activity.
<LinearLayout
    xmlns:android="http://schemas.android.com/apk/res/android"
    xmlns:app="http://schemas.android.com/apk/res-auto"
    xmlns:tools="http://schemas.android.com/tools"
    android:layout_width="match_parent"
    android:layout_height="match_parent"
    tools:context=".MainActivity"
    android:orientation="vertical"
    style="?pageBG">

        <Button
            android:id="@+id/btnApplyDarkTheme"
            android:layout_width="wrap_content"
            android:layout_height="wrap_content"
            android:text="Apply Dark Theme"
            tools:ignore="MissingConstraints" />

        <Button
            android:id="@+id/btnApplyLightTheme"
            android:layout_width="wrap_content"
            android:layout_height="wrap_content"
            android:text="Apply Light Theme"
            tools:ignore="MissingConstraints" />

        <TextView
            android:id="@+id/lblTextView"
            android:layout_width="wrap_content"
            android:layout_height="wrap_content"
            android:text="THECODEPROGRAM.COM"
            tools:ignore="MissingConstraints" />

</LinearLayout>
Now here first we are going to define some style elements that we are going to use in our theme. These elements can be background color, some width and height values or maybe some gradients. I will define the below styles inside of the res/values/styles.xml file under resources element. You do not need to create any file for this.
Below I defined the styles for the background of the activity, buttons and textviews for both dark and light mode of the my custom theme. You can define for more elements which you use at your project
<style name="dark_page">
        <item name="android:background">#000</item>
    </style>

    <style name="light_page">
        <item name="android:background">#fff</item>
    </style>

    <style name="dark_button">
        <item name="android:textColor">#fff</item>
        <item name="android:background">#000</item>
        <item name="android:textSize">25dp</item>
    </style>

    <style name="light_button">
        <item name="android:textColor">#000</item>
        <item name="android:background">#fff</item>
        <item name="android:textSize">25dp</item>
    </style>

    <style name="dark_textview">
        <item name="android:textColor">#fff</item>
        <item name="android:background">#000</item>
        <item name="android:textSize">25dp</item>
    </style>

    <style name="light_textview">
        <item name="android:textColor">#000</item>
        <item name="android:background">#fff</item>
        <item name="android:textSize">25dp</item>
    </style>
Now it is time to define our themes. In our style.xml file I will define themes like below. To create a theme first you have to set a parent theme. Here I setted the AppCompat.NoActionBar theme. When I applied this theme first the parent theme will be applied and then our configurations will be override it. In here the action bar will disappeared according to parent theme and then our styles will be applied.
    <!-- Styles for THE_DARK_THEME -->
    <style name="Theme.THE_DARK_THEME" parent="Theme.AppCompat.NoActionBar">
        <item name="pageBG">@style/dark_page</item>
        <item name="android:textViewStyle">@style/dark_textview</item>
        <item name="android:buttonStyle">@style/dark_button</item>
    </style>

    <!-- Styles for THE_LIGHT_THEME -->
    <style name="Theme.THE_LIGHT_THEME" parent="Theme.AppCompat.NoActionBar">
        <item name="pageBG">@style/light_page</item>
        <item name="android:textViewStyle">@style/light_textview</item>
        <item name="android:buttonStyle">@style/light_button</item>
    </style>
As you can see above I defined the styles for all textviews and buttons. Also I defined for another attribute name pageBG. I applied it for the background of the screen like below:
<LinearLayout
    ............
    style="?pageBG">
     ...............
</LinearLayout>
So how did we do it?
I created custom attribute. To prevent any confussion I created an xml file named attrs.xml under res/values/ folder. And I defined the pageBG as an attribute to use everywhere.attrs.xml
<?xml version="1.0" encoding="utf-8"?>
<resources>
    <attr name="pageBG" format="reference" />
</resources>
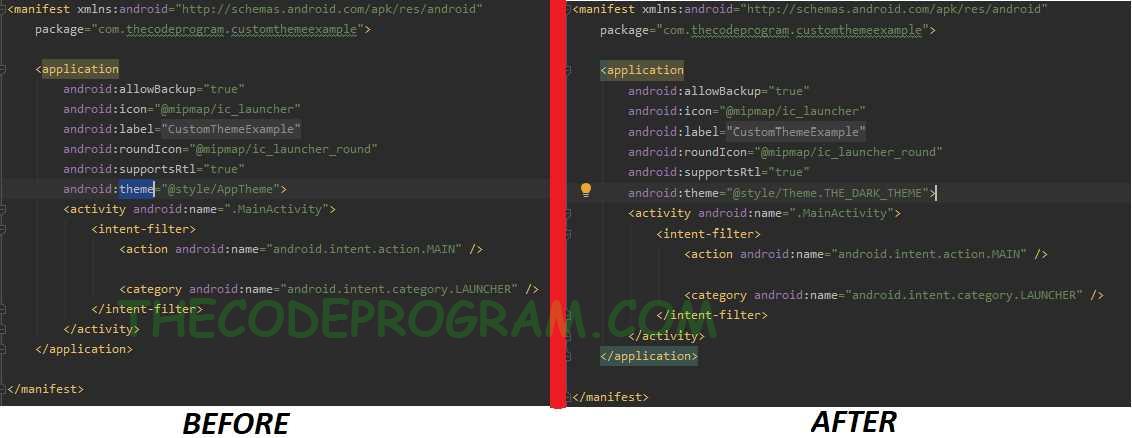
You can change the default theme from you AndroidManifest file. Under the application element you can see the theme attribute. Below image you can see how to do it.
Now if we want to change the theme via programmatically we nee to do below steps.
I added two Button elements in the activity. To apply the themes. I will make this on clicks to these buttons.
First write below function.
In this function we finish the activity and we restart. The theme will be applied befor the super so we need to do it on create and before the super.onCreate. Also we sent an intent which contains the themes resource value as integer.
    private void changeTheme(int theme)
    {
        this.finish();
        Intent intent = new Intent(this,MainActivity.class);
        intent.setFlags(Intent.FLAG_ACTIVITY_CLEAR_TOP|Intent.FLAG_ACTIVITY_NEW_TASK);
        intent.putExtra("set_theme", theme);
        startActivity(intent);
    }
In here first we defined the the buttons. Now the important thing is the applying the theme before the super functon. Here we get the intent and if there is no intent with the set_theme it will set the 0 as default value. And if the value is n0t 0 the theme will be applied. Else if the value is 0 - there is no set_theme intent- it will be stay at default theme which defined in android manifest.
And the buttons will sent the directly the theme resource id values.
    Button btnApplyDarkTheme, btnApplyLightTheme;

    @Override
    protected void onCreate(Bundle savedInstanceState) {
        //it is important to make this operation before super function
        if( getIntent().getIntExtra("set_theme", 0) != 0){
            setTheme(getIntent().getIntExtra("set_theme", 0));
        }

        super.onCreate(savedInstanceState);
        setContentView(R.layout.activity_main);

        btnApplyDarkTheme = findViewById(R.id.btnApplyDarkTheme);
        btnApplyLightTheme = findViewById(R.id.btnApplyLightTheme);

        btnApplyDarkTheme.setOnClickListener(new View.OnClickListener() {
            @Override
            public void onClick(View v) {
                changeTheme(R.style.Theme_THE_DARK_THEME);
            }
        });

        btnApplyLightTheme.setOnClickListener(new View.OnClickListener() {
            @Override
            public void onClick(View v) {
                changeTheme(R.style.Theme_THE_LIGHT_THEME);
            }
        });

    }
Below you can see the image.
That is all in this article.
You can reach the example application on Github via : https://github.com/thecodeprogram/CustomThemeExample_Android
I wish you all healthy days.
Have a good building custom themes.
Burak Hamdi TUFAN.
Tags
Share this Post
Author

I am a software developer experienced 15 years and here to share all my programming experiences. I have worked on so many platforms and programming languages especially C, C#, C++ and Java. I am studing PhD at Kocaeli University on Aviation Technologies. I am building softwares and technologies on aviation.


How to use Text to Speech in Android

Comments