
How to create Windows Services in C#
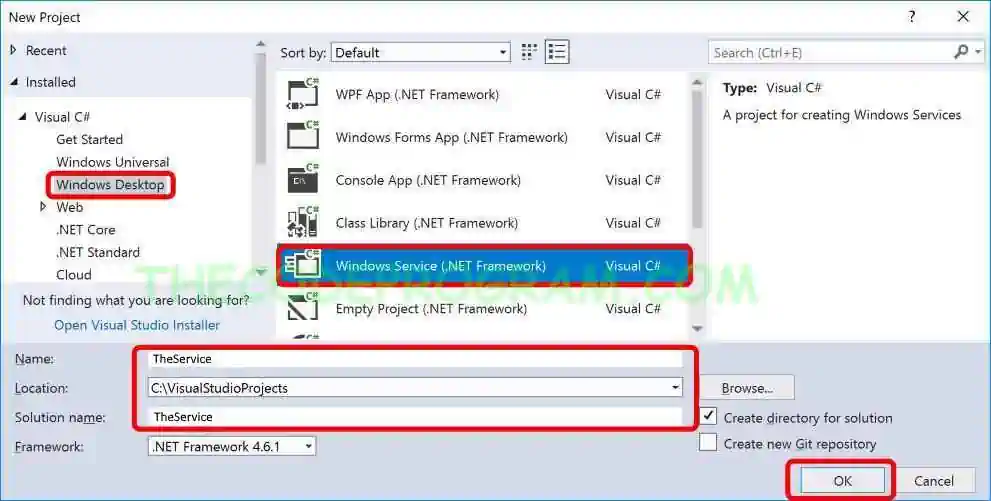
Hello everyone, in this article we are going to talk about how to create the windows service in C# language. We will make this example on Visual Studio and we are going to create a simple windows Service.Let's get started.
Firstly What are the Windows Services
Services are small programmies which work at background without any output and any interface. We can use them to check a web service or check a file for being downloaded. We can create database areas for other programs and we can log the system resources etc. We can do anythig at background with these programmies which named as services.Now let's create a service project with C# and Visual Studio.
Now we are going to need two main methods. These methods are going to work when service started and stopped. These methods are override methods and make sure implemented them in the source.
protected override void OnStart(string[] args)
{

}

protected override void OnStop()
{

}
protected override void OnPause()
{

}

protected override void OnContinue()
{

}
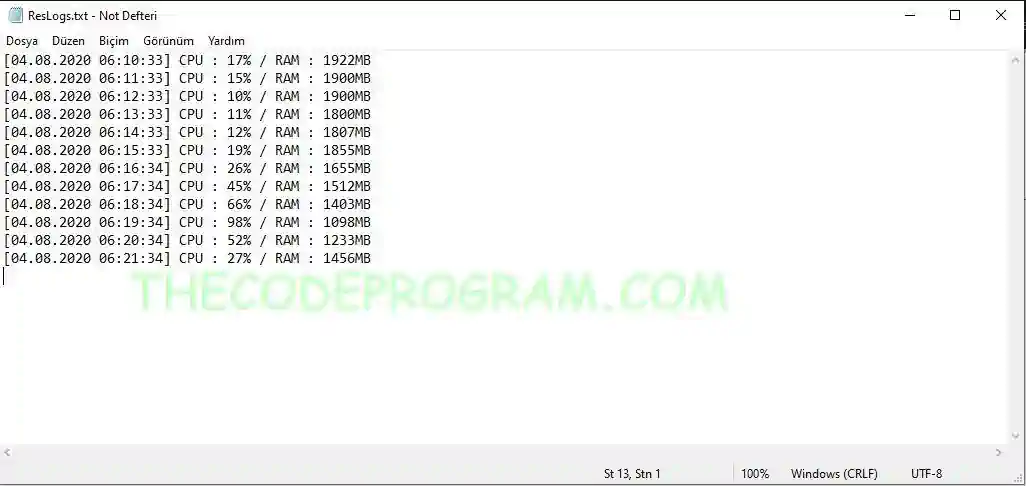
Now let's make some logs with our service according to our system resource usages. This is why we created this service :))
private static Timer timer;
PerformanceCounter cpuCounter;
PerformanceCounter ramCounter;

StreamWriter write = File.AppendText( "D:\\ResLogs.txt" );

cpuCounter = new PerformanceCounter("Processor", "% Processor Time", "_Total");
ramCounter = new PerformanceCounter("Memory", "Available MBytes");

public string getCpuUsage()
{
       return cpuCounter.NextValue()+"%";
}

public string getRAM()
{
       return ramCounter.NextValue()+"MB";
}

private static void StartTimer()
{
        // Create a timer with specified inerval.
        timer = new System.Timers.Timer(60000);
        // Hook up the related event which perform the task
        timer.Elapsed += TimerEvent;
        timer.AutoReset = true;
        timer.Enabled = true;
}

private static void TimerEvent(Object source, ElapsedEventArgs e)
{
        write.WriteLine( "[" + DateTime.Now.ToString() + "] " + "CPU : " + getCpuUsage() + " / RAM : " + getRAM()  );
}

protected override void OnStart(string[] args)
{
    StartTimer();
}

protected override void OnStop()
{
    timer.Enabled = false;
    write.Close();
}
design view screen
and right click on this screen Then click the Add Installer. Then at the properties screen we are going to set the configurations of this installer.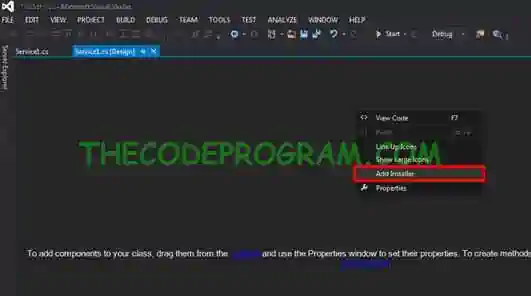
That is all in this article.
Have a good service creating
Burak Hamdi TUFAN.
Tags
Share this Post
Author

I am a software developer experienced 15 years and here to share all my programming experiences. I have worked on so many platforms and programming languages especially C, C#, C++ and Java. I am studing PhD at Kocaeli University on Aviation Technologies. I am building softwares and technologies on aviation.


Comments