Communicating Arduino and STM32 with Cubemx on I2C
Hello everyone, in this article we are going to see the communication between Arduino and STM32 over I2C communication protocol. We will use CubeMx and HAL library at STM32 side.Let's get started.
Firstly let's configure STM side program. In this example we are going to use STM32F429ZI nucleo board. First create a CubeMx project with STM32F429ZI nucleo board and enable I2C hardware.
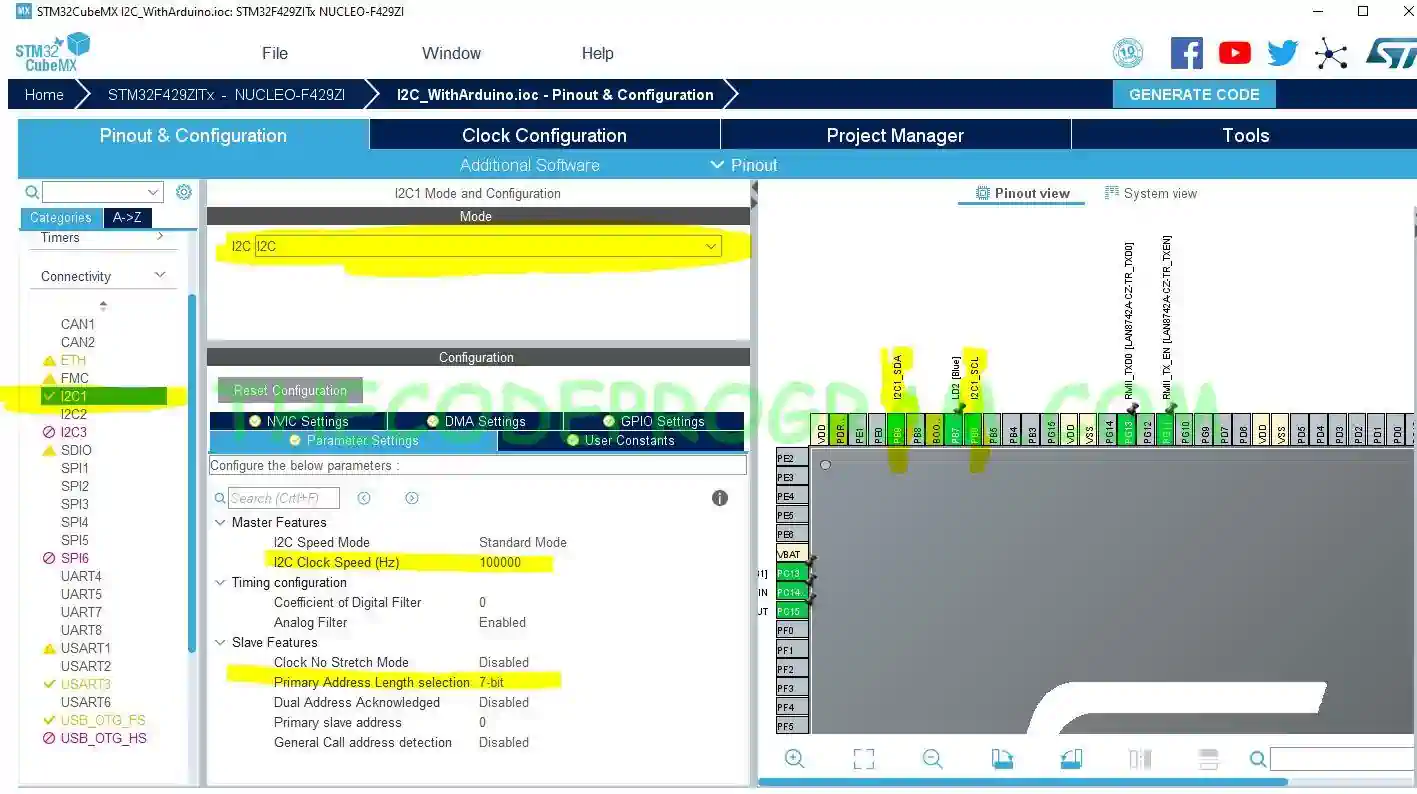
In here we are in need of an char array to store incoming data from I2C and communication address value of I2C protocol.
/* USER CODE BEGIN PV */

#define ARDUINO_PRO_MICRO_I2C_RECEIVE_ADDRESS 0x33<<1
unsigned char ArduinoProMicroI2CData[50];

/* USER CODE END PV */
while( HAL_I2C_Master_Receive(&hi2c1, ARDUINO_PRO_MICRO_I2C_RECEIVE_ADDRESS , ArduinoProMicroI2CData, 50, 100) != HAL_OK )
{ }
HAL_Delay(1000);
Until here our STM32 program is ready and now Arduinos turn.
#include <Wire.h>
#define DEVICE_ID 0x33
int counter = 0;
void setup() {
Wire.begin(DEVICE_ID);
Wire.onRequest(requestEvent);
Serial.begin(9600);
}
void loop() { }
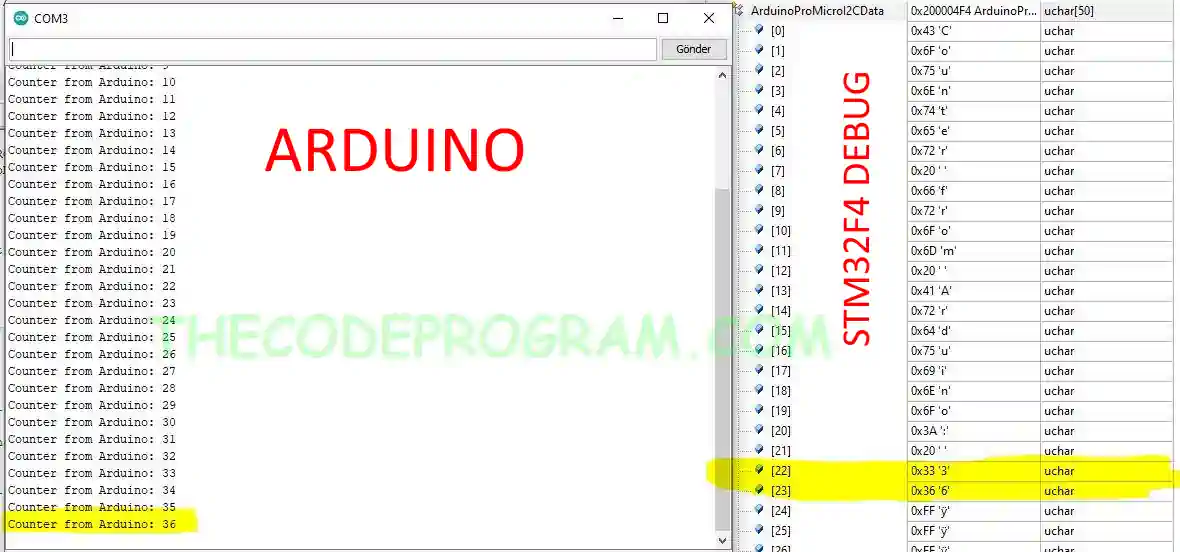
void requestEvent()
{
counter++;
String data = "Counter from Arduino: " + String(counter);
Serial.println(data);
Wire.write(data.c_str());
}
And lastly most important part of example. Do not forget the connection of Arduino and STM32.
And that is it.
That is all in this article.
Have a great communication.
Burak Hamdi TUFAN
Tags
Share this Post
Author

I am a software developer experienced 15 years and here to share all my programming experiences. I have worked on so many platforms and programming languages especially C, C#, C++ and Java. I am studing PhD at Kocaeli University on Aviation Technologies. I am building softwares and technologies on aviation.
Differences between I2C and SPI

Comments