
How to use External Fonts in Android
Hello everyone, in this article we are going to talk about using external fonts in our android programs. How can we add fonts resources and use these external fonts in our android applications.Let's get started.
There are several ways to do it. We can do it with dynamically java codes or with design xml files. Also we can use the style xml files. To do it first create an android project with android studio.
In the first method that I use.
First create a folder under main folder and name it assets and under it create another folder named fonts. Below image you can see it.

After it on the activity and onCreate function you will use the Typeface and load the font to the textview. I used onCreate method. You can use which method you want. ıt depends on you.
public class ReadActivity extends AppCompatActivity {

     TextView lblContent ;

    @Override
    protected void onCreate(Bundle savedInstanceState) {
        super.onCreate(savedInstanceState);
        setContentView(R.layout.activity_read);

        lblContent = (TextView)findViewById(R.id.lblContent);
        lblContent.setText(""The text will be font-applied on.);

        // Load Font Family
        Typeface tf = Typeface.createFromAsset(getAssets(), fontPath);
        // and apply the font
        lblContent.setTypeface(tf);
     }
}
Below image you can see the output of the code block.

There is another method.
Second method is creating a custom font xml file. You can create the custom font configuration and you can use this file at your project. Now take a look at this.
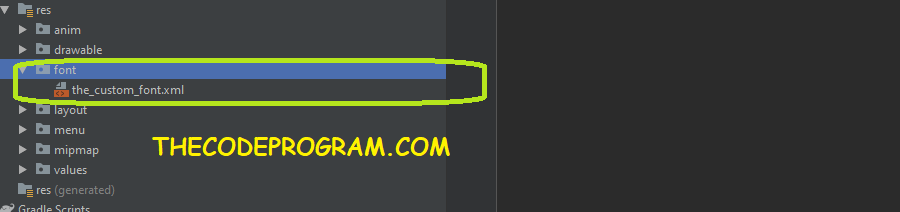
First create a folder named font under res folder. And create a custom font xml file. Below image you can see how to do it:
You can write some configurations in this configuration file.
<?xml version="1.0" encoding="utf-8"?>
<font-family
    xmlns:android="http://schemas.android.com/apk/res/android">

    <font
        android:font="@font/comic"
        android:fontStyle="normal"
        android:fontWeight="100"  />
    <font
        android:font="@font/comic"
        android:fontStyle="italic"
        android:fontWeight="100"  />

    <font
        android:font="@font/comic"
        android:fontStyle="bold"
        android:fontWeight="100"  />

</font-family>
And your file is ready. Now you can use this custom font configuration in tour design file or typeface. Below XML code block you can see how to do it.
     <TextView
         android:id="@+id/lblCatTitle"
         android:layout_width="fill_parent"
         android:layout_height="wrap_content"
         android:fontFamily="@font/the_custom_font"
         android:textSize="@dimen/feed_item_profile_name"
         android:textStyle="bold" />
There is another method more...
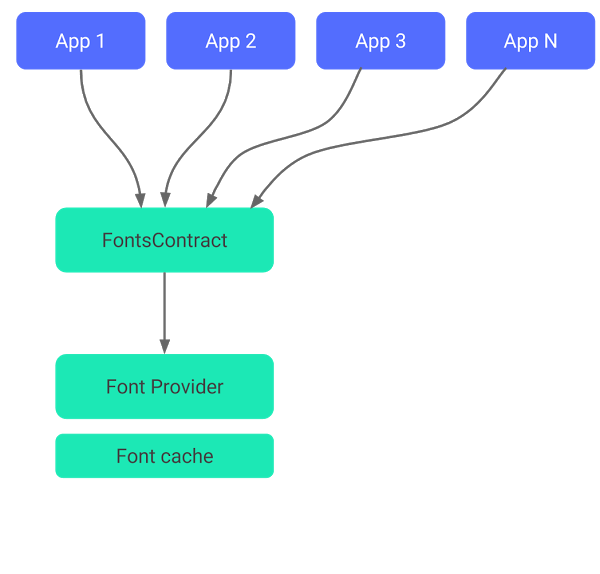
You can use the downloadable fonts. With this method you can reduce the apk file size and let the device download the fonts. You can download them from any font provider. Your android studio version must be higher than 3.0 and android api version must be higher than api26. With this method you can share the same fonts from the providers at differant applications.
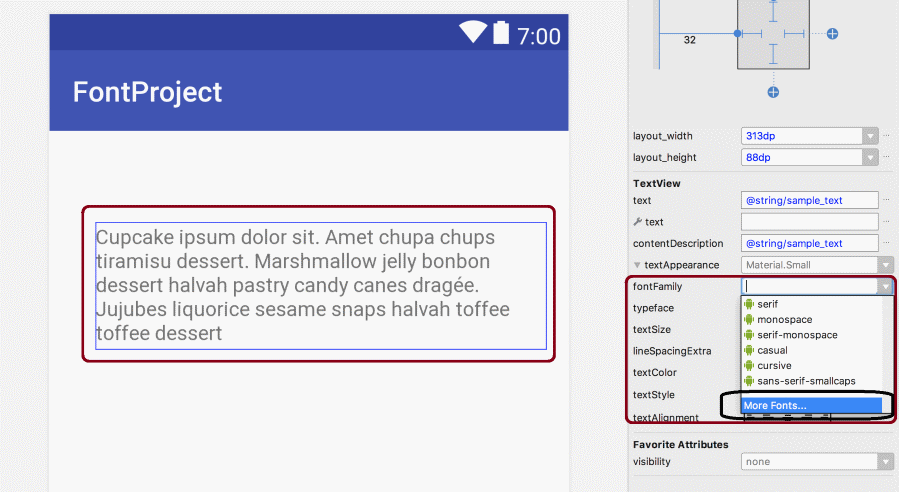
In the Layout Editor, select TextView which you want to apply the font and , and then under Properties, select fontFamily > More Fonts.
On Resource screen select the Source. This will be font provider. Below image selected the Google Fonts. From the font listbox select a Font and click OK to create a downloadable font. Below image you can see it.
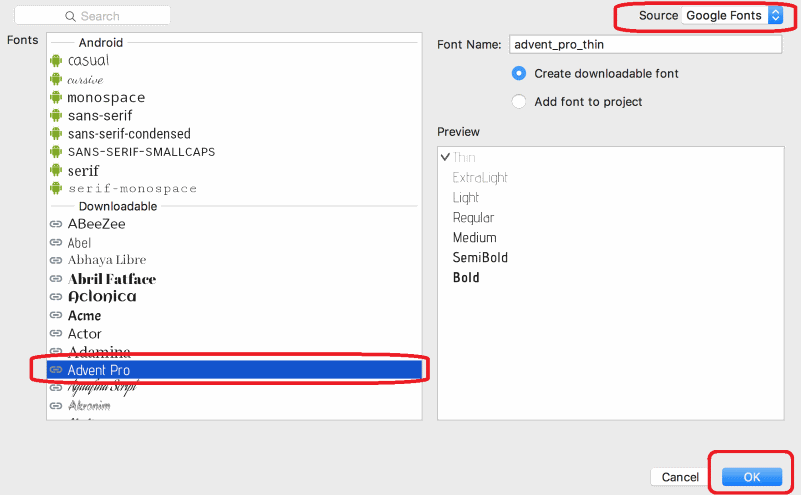
After this operation android studio will generate an XML file to use this font.
FontRequest request = new FontRequest("com.example.fontprovider.authority",
        "com.example.fontprovider", "my font", certs);
FontsContract.FontRequestCallback callback =
    new FontsContract.FontRequestCallback() {
        @Override
        public void onTypefaceRetrieved(Typeface typeface) {
            // Your code to use the font goes here
            ...
        }

        @Override
        public void onTypefaceRequestFailed(int reason) {
            // Your code to deal with the failure goes here
            ...
        }
};
FontsContract.requestFonts(context, request, handler, null, callback);
To use this with XML design first you must implement the appcompat on the build.gradle file.
implementation 'com.android.support:appcompat-v7:28.0.0'
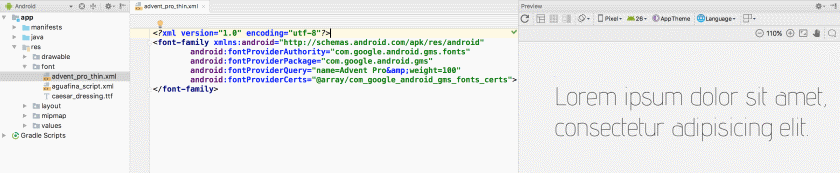
Create a custom font under res/font folder. Then write below XML in that file.
<?xml version="1.0" encoding="utf-8"?>
<font-family xmlns:android="http://schemas.android.com/apk/res/android"
        android:fontProviderAuthority="com.example.fontprovider.authority"
        android:fontProviderPackage="com.example.fontprovider"
        android:fontProviderQuery="example font" >
</font-family>
You can call this XML file as font family of textview.
That is all in this article.
Burak Hamdi TUFAN
Tags
Share this Post
Author

I am a software developer experienced 15 years and here to share all my programming experiences. I have worked on so many platforms and programming languages especially C, C#, C++ and Java. I am studing PhD at Kocaeli University on Aviation Technologies. I am building softwares and technologies on aviation.

How to use Shared Preferences in Android


Comments